Showing posts with label Blogger Tips. Show all posts

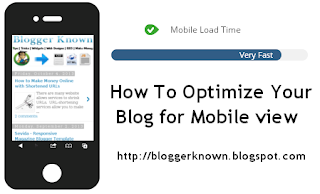
optimize blog for mobileMake Blogger ready for Mobile Phones

In this day we can not ignore the importance of mobile internet. Because almost all of us have to use the mobile, and make easy to use internet access. And every internet provider company trying to provide best internet services like 3G's , Wifi, mobile apps,etc.

So many of your blog readers come through mobile phones. and our website is compatible for mobile phone browsers. But if you don't make the mobile friendly blog, then we have to lose a lot of mobile readers, because in a mobile phone, a normal blog takes lot of time to load and there are different problems that your website not fitting properly within the mobile screen.


Start working and make mobile friendly blog. sign in to your blog first.

Step No.1

Go to Blogger account > Template > Mobile

Blogger Templates

After click setting button a popup windows open clik "Yes. Show mobie template on mobile devices. and also choose mobile template and Save.

mobile template

Step No.2

Find this line >
<b:include data='blog' name='all-head-content'/>
And paste this code below that line...
<meta content='IE=EmulateIE7' http-equiv='X-UA-Compatible'/>
<b:if cond='data:blog.isMobile'>
<meta content='width=device-width, initial-scale=1.0, user-scalable=0' name='viewport'/>
<b:else/>
<meta content='width=1100' name='viewport'/>
</b:if>
Save Changes!

Now your blog ready for mobile browser with good speed. visit your blog for mobile view add ?m=1 tag in url example = http://bloggerknown.blogspot.com/?m=1

Thank you for your time for read this post i hope you like this post.
Robots.txt
Hi ! In this tutorial I am going to show you how to edit your Blogger blog robots.txt file. Webmasters use custom robots.txt file to control search engine web robots (also known as Web Wanderers, Crawlers, or Spiders) to crawl some directories and web pages or links of website or blog. when we take settings robots.txt file in blogger then search engine automatically index or remove pages from search engine according to the settings. 

By default each website allows the Search engines robots however if you would like to restricts the robots either to not crawl any bound directory, file or the complete website then you may want the robots.txt file in which you've got to write instructions for search engine bots.

Steps to edit robots.txt on blogger

Your Site Settings › Search preferences › Crawlers and indexing  
Here you will able to see two options Custom robots.txt and Custom robots header tags.These two
 options would offer you the flexibility to customise your robot.txt file.In the last post i told you about
Custom robots header tags.
Now press edit button which is present after  'Custom robots.txt' option. After pressing on edit button
you can see a message " Enable custom robots.txt content? " so press "Yes" and proceed to next step.
Custom robots.txt - Search preferences
Now you can see  text area, type the content which you want to exclude a content from crawling.
Click on Save Changes button.
Enable Custom robots.txt - Search preferences

You are done!
How to block Link from search engines?
No, you have to write the URL. For example, if your want to stop robots from crawling this URL
(www.bloggerknown.blogspot.com/p/about.html) then, in the robot.txt file you will enter this command.
User-agent: *Disallow: p/about.html
Your robots.txt file located under your main blogspot directory as for Blogger Known its located on the following url:
http://www.bloggerknown.blogspot.com/robots.txt
By default blogger robots.txt contains the following content:
User-agent: Mediapartners-Google
Disallow:
User-agent: *
Disallow: /search
Allow: /
Sitemap: http://bloggerknown.blogspot.com/feeds/posts/default?orderby=UPDATED
I know this post is not a new thing but I hope it might help many newbies to understand the importance of robots.txt.
Custom Robots Header TagsBlogger is continuously improving search preference feature, Add Custom Robots Header Tags are very important for every blogger  for batter SEO. Today tutorial i tell you how to enable custom robots header tags in blogger. You have to be careful to setup custom robots text because if you do something wrong Google not index your page in search engine. Follow the instructions carefully and it'll positively help you to boost your web site traffic.

Step 1: To enable these tags, go to Blogger > Settings > Search Preferences, click Edit next to "Custom robots header tags," and select Yes.

Step 2: Select Yes Option and customize setting shown in the below image.

You must learn about tags when should you use them.
all:  There are no restrictions for indexing or serving. This is default for all pages
noindex:  Do not show this page in search results and do not show a "Cached" link in search results.
nofollow:  Do not follow the links on this page
none:  Equivalent to noindex, nofollow
noarchive:  Do not show a "Cached" link in search results.
nosnippet:  Do not show a snippet in the search results for this page
noodp:  Do not use metadata from the Open Directory project (DMOZ) for titles or snippets shown for this page.
notranslate:  Do not offer translation of this page in other languages in search results.
noimageindex:  Do not index images on this page.
unavailable_after: [RFC-850 date/time]: Do not show this page in search results after the specified date/time. The date/time must be specified in the RFC 850 format. Example: 17 May 2012 15:00:00 PST

Custom Robots Header Tags

Step 3: Now click on ""Save changes" button > Done

That's all! If you have any doubt or need help about it, please leave comment.

How to Create Google+ Page

Google recently introduced Google+ Page. Many people take advantage of it and still many new users do not know much about it so today tutorial i have tell you  how to create google+ plus for your business and individual website or blog. and many user use defult blogger profile they how can move blogger profile to google + plus Pages. it is very similar to the Facebook Fan Pages.

Why Use Google Plus?

Google+ Pages that a media business promotion, brand, organization, until the web / blog.
I  see so many advantages Google+ Pages, such as to unite the fan or follower of the blog in a major media as well as serve as a medium of information for them about updating the blog.
Associated with the profile, of course, use that profile integrated (sourced from one profile to all kinds of Google services) makes it easy to fit into a variety of services with just one click without having to log in repeatedly.
it is very similar to the Facebook Fan Pages.

How to create a Google+ Fan page

1. Go to this page  here you will find many category page. To create a page for your site then click Product or Brand
How to Create Google+ (Plus) Fan Page for Website/Blog

2.Select a category click website and click Next
google profile for blog

3. Enter the Blog Title and URL as Follows and Tick the Agree Page Terms check-box and Click on Create Button.
How to Create Google+ (Plus) Fan Page for Website/Blog
4. Enter the Tagline of the Blog and Upload a Profile photo (if any!)
5. Share your page with friends after complete click Finsh

 To Grow your fans and Audience, add the official Google+ page badge to your blog.
Click here to create blogger badge for your blog


How to Transfer Blogger Profile to Google Profile


You have created the Google + account​​ already follow above method.
1. Logged into Blogger
2. Go to Dashboard
3. Select the tab  Google+ and select the Upgrade Google +,see the below picture:
How to Create Google+ (Plus) Fan Page for Website/Blog

Tick the I have read above check-box and Click on Switch Now
How to Create Google+ (Plus) Fan Page for Website/Blog
Now move on To your Google+ Plus Page.
How to Create Google+ (Plus) Fan Page for Website/Blog

After the process is complete, Blogger will display Google+ profile (name, profile picture, and information) on the blogger profile gadget (if installed) and when my friend made ​​a new post or comment (name and profile picture) , but the old posts and comments have not changed. If my friend was not satisfied with the integration of Blogger to Google+ profile, do not worry. Blogger profiles can be restored to the condition, such as that already noted above, the return (revert back) Blogger from Google+ profile no more than 30 days after the integration is performed. trick? Just go to Blogger revert profile and finish.
Good Luck & Happy Blogging
Preview on blogs, Maybe for a blogger who likes to modify the template, this is sometimes a problem Preview to see the result of the modification and in particular, in the "header-wrapper" blog, your example of the "Navigation Menu" with hover effect under the header, it will automatically be blocked by the "Preview" and you can not see the effect that there is on the menu.

Eliminate Effect Preview


I fix that??
way to overcome the preview element you can simply add the following CSS3 code above code
]]> </ b: skin>
. Bloggers-clickTrap {display: none}

If you have added the code you tried the preview and the effect of the preview will disappear but it says "Preview" it still appear.
Create a Beautiful Your Blogger Blogs
Blogger Template Designer is a new way for you to easily customize the look of your blog. You can select a variety of templates, images, colors, and column layouts to make your blog an expression of you.

If do you want to use own blogger Templates Click Here

If you want to use customize blogger Templates Follow the step and install a blogger templates in blogger.


Download your new blogger template to your computer. If the template is contained in a zip file, ensure you have extracted the XML template.
Note:  Upload only xml file for blogger templates
  1. Login to your blogger account
  2. Now just select Template and you can see bellow button at the right hand side.
  3. Now just click on backup / restore button and one box will pop up (you can see it in bellow snapshot)
  4. Now simply browse your template and click on upload and you have done !
You can also change the arrangement of the widgets using layout.


install blogger template


That’s all Don’t forget to subscribe and  use the comment box for your valuable thoughts

More

Search This Blog